Hello everyone, as we all know that Share Extension is appeared from iOS 8, then the capability to share content with other entities, such as social sharing websites or upload services can be done in an easy and convenient way.
We, 9series, an iOS application development company has started doing all the development using Advanced Programming Language Swift.
So today, we are going to build a Shared Extension app in iOS10 with Swift 3.0, an ability to show an icon on the common share-sheet that associates with our main app, which handles the sharing of the content that the user has requested. So the user can easily switch from one app to another, for example, we are sharing a photo from the album with some content that switches our app where we want to upload data to the server.
This is mainly a programming article, so you are required to have Xcode 8 on Mac.
Let’s get started !!!
1. Make a new Xcode Project
First Create a cocoa touch Single View Application in Xcode 8 with some basic UI. Like it is shown below
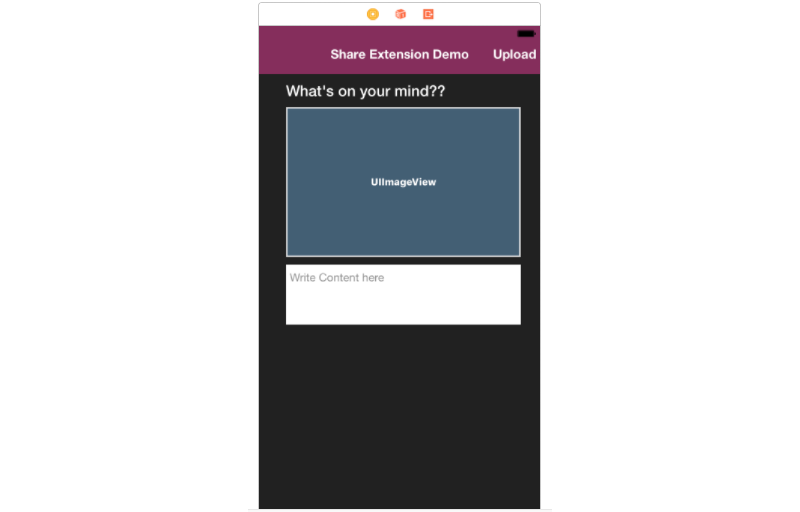
Design the screen with UILabel, UIImageView, UITextView and with UIButton.
When user comes with some sharable content from parent app, we can upload or we can use anywhere in our app.
For Eg, let’s create the Share Extension.
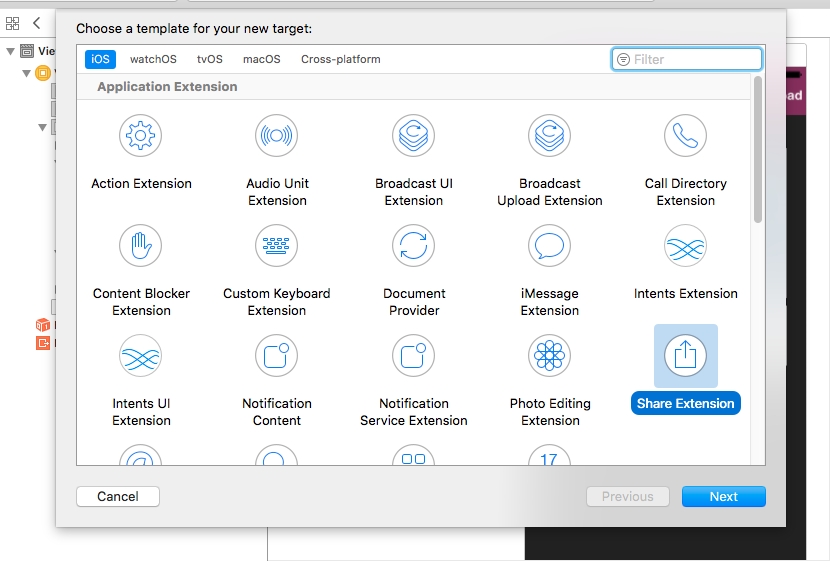
Give some proper name of that extension and it will show you popup view for activating your extension scheme. Choose Activate to use this scheme for building and debugging.
Note: Schemes can be chosen from the toolbar or Product menu.
3. Make an App Group
We want to communicate two app for sharing some content, but Apple doesn’t want a complete free flow of data between the two. Apple recommends a shared NSUserDefaults as a meeting ground where the two app can exchange their data.
Now, we need to make an app group.
Click on your project in the Navigator Pane of Xcode, click on capabilities and your app under the target list turns on App Groups. Give it a name like “group.BUNDLE IDENTIFIER”.
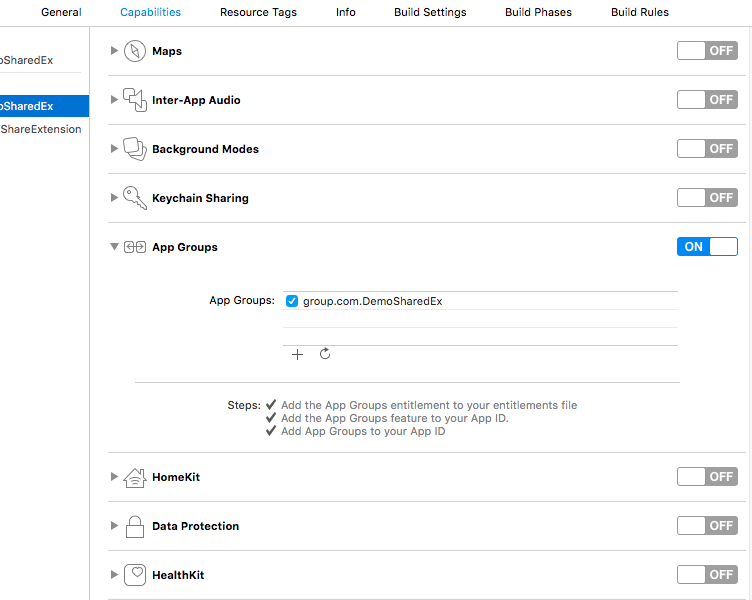
Now click on your extension and do the same.
4. Implementing Share Extensions in Swift
First open your viewController, we won’t go into much detail, because it’s a destination viewController. So we can read content data from User Defaults which is shared by user from Share ViewController.
We have also created an IBAction of Upload button, so that content and photo which is shared by user can be used anywhere in our app.

Here, “sharedIdentifier” is the UserDefaults suiteName that we have used for the app group name. An extensionContext where we get a list of NSExtensionItems. This is a fixed array of data sent to our extension from a parent app. We are getting photo and content from our photos app that are already set to our main app.
Let’s look at the “ShareViewController” from our Shared Extension Folder which is subclass of SLComposeServiceViewController. SLComposeServiceViewController has some methods and properties associated with the lifecycle of a share-sheet composition view.
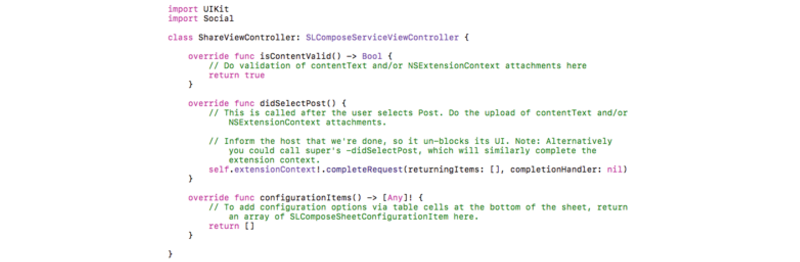
isContentValid() :- It is called every time when the content in the compose view changes. Here, we can check the input data is valid or not. It is called first, and will disable the post button when it evaluates to false.
didSelectPost() :- As the name suggests, it is called when the user presses the post button. Here we can do something with the user input. Once the upload is scheduled, you must call completeRequestReturningItems([], completionHandler:) so that the host app can un-block its UI. When the upload request is done, it calls the completion handler that was passed into the previous mentioned function call.
configurationItems() :- Here, we can add more things for the user to select when they are sharing. In our case we are sharing a photo with contentText. You can also make it more dynamic with some other controls.
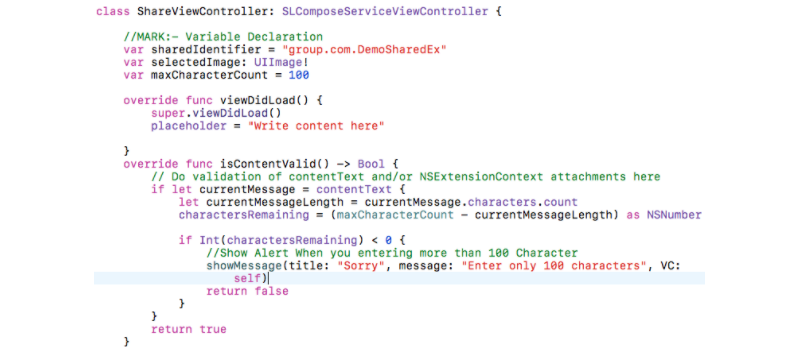
contentText :- A string which represents what the user has typed into the composer.
charactersRemaining :- Is a number which appears on the compose sheet. When negative number shows, its appearance becomes red.
Here is the code of “ShareViewController”
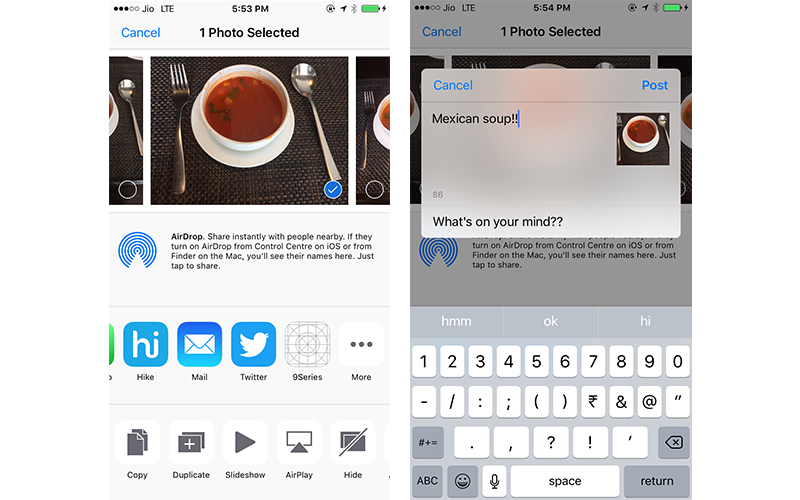
Here, we are selecting one image from photo album and then clicking on share button, it will open share sheet with our Share Extension app Icon.
Select that app and it will open composition view.
We have mentioned maximum characters of contentText as 100, so if you enter more than 100 characters, than it will generate alert message and post button will be disabled. You can also check number of characters at the end of compose sheet.
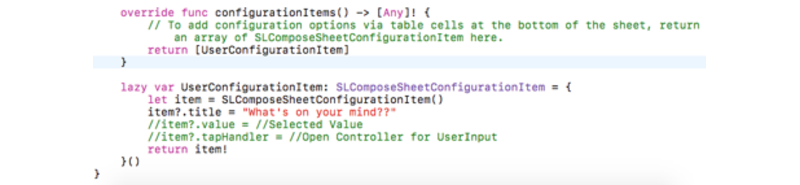
Configuration! items is where we can add more things for the user selection, when they are sharing. Like, Open UITableViewController as subview Controller and selecting User Input it will display as item value at the bottom of compose sheet.
Configuration! items has title, value, and a tapHandler. So you can add extra functionality for selection from User.
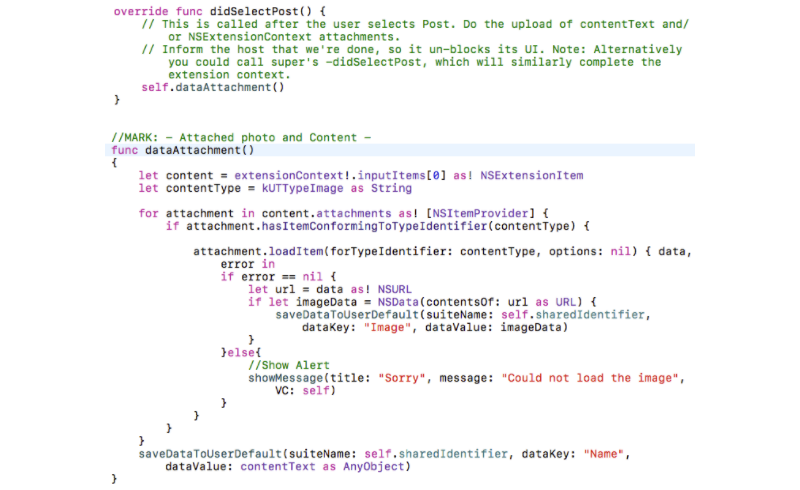
ExtensionContext has list of attachment as NSExtensionItem. We’ll loop through the attachments, and look for one typed as an image. It will have the type identifier kUTTypeImage. NSItemProvider items are lazily loaded images, videos, URLs and so on. We’ll load it using “loadItemForTypeIdentifier”. This has a completion handler, where we’ll read the image from the URL, and then we’ll save it to defaults.
After pressing Post Button, It will save Image in UserDefaults with “Image” key, and contentText with “Name” key.
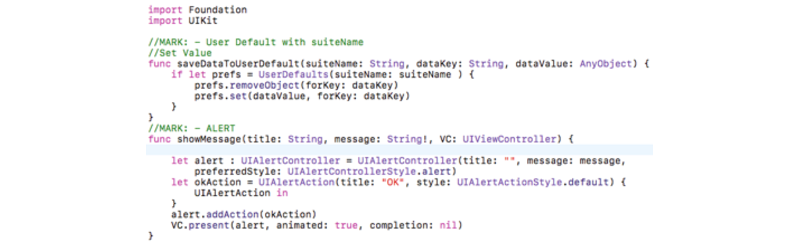
We have created two utility methods for saving data to user defaults and for alert message.
Till now, Apple wouldn’t accept this in their app store. We need to tell iOS when to show our share extension, and what can be selected. Otherwise when we compile we’ll get a warning.
“Warning: Embedded binary’s NSExtensionActivationRule is TRUE PREDICATE”
So for that, open the “info.plist” as source code by right clicking on it. We’re going to change the NSExtensionAttributes section. This means our extension is activated only for images, and only when it’s a single image. If you select more than one image, the extension app automatically hides from share-sheet.
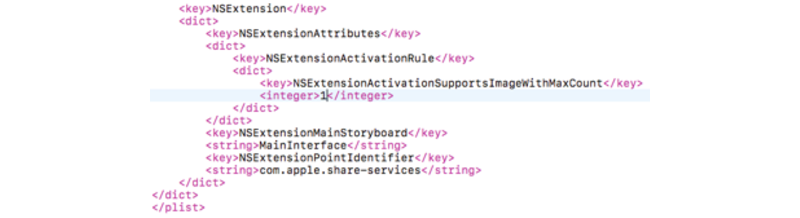
You can change your display name of your app in share sheet by replacing the code in the “info.plist” of your Extension.
5. Test Your Share Extension
1. First you have to simply run your app.
2. Then run your Share Extension.
3. When suggested to choose an app to run, choose Photos.
4. Once the extension starts running, select a photo and tap on the Share button.
5. On the first run, you will need to add your extension to the share sheet.
6. Click on the More button to the right of the other share icons and turn on the switch for your extension & then select Done.
7. Now you will be able to see your extension icon in share – sheet.
8. Select an individual photo and click on share. By selecting your app, add some content and press post button.
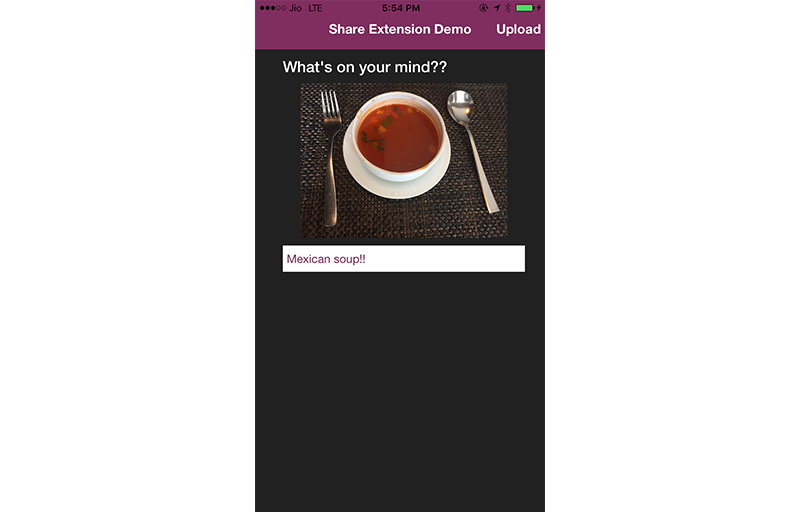
The image will be saved to your main app. To confirm this, redirect to your app. You can check the content you entered in the textview and the image above the content.
In this article, our best iOS application developers in USA, have only covered some basic UI. You can also make it more dynamic with other controls.
Hopefully, all of this will help you share data with your parent app.

Happy Coding! and feel free to share your own experience on “[email protected]”.